Quick Summary
This guide walks you through logging in, writing scripts, controlling generation, managing characters, and exporting your final panels.
1. Logging In
You can log in either using Google or via our website credentials. Logging in through the website gives you extra referral credits.
.png)
.png)
2. Writing Your Story
Inside a project, use the tab header to switch between the Story Text Box and Advanced Options.
Story box format
You can write directly or upload a Word or PDF file. Use the panel format below to keep scenes consistent.
In first panel, (action), (setting), (camera angle).
In second panel, (action), (setting), (camera angle).
In third panel, (action), (setting), (camera angle)..png)
.png)
.png)
3. Advanced Options
Switch to the Advanced Options tab to control generation settings.
- Style Presets: Choose a look like Cinematic, Photographic, Anime, or Digital Art.
- Art Style: Select Default Manga, One Piece, Jujutsu Kaisen, My Hero Academia, and more.
- Panel Layout: Choose your manga or comic grid layout.
- Color Options: Full color or black and white.
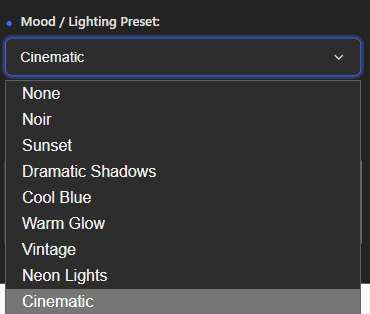
- Lighting and Mood: Presets like Neon, Sunset, or Cinematic.
- Mangafy Checkbox: Adds traditional manga effects like inking and cross-hatching.
- Custom Art Style: Add your own style prompt.
- Guidance Scale: 1-15 controls how closely the AI sticks to your prompt. Recommended value is 7.
- Seed and Randomizer: Keep a seed for consistent results, randomize for variation.
.png)
.png)
.png)
.png)
.png)
4. Character Management
Use the Character Bar to upload, edit, or delete characters. Each character includes an image, name, role, and description for the AI.
Character description vs script box
Use the character description for permanent traits only:
- Hair, eyes, face features, body type
- Age or vibe
- Scars, tattoos, glasses, etc.
Use the script box for anything that can change panel to panel:
- Clothing and accessories
- Actions and emotions
- Environment and scene changes
Character Description
Riku is a teenage boy with messy black hair, blue eyes, and a tired expression.

Script
In the first panel, Riku is crying at home. He is wearing a white t-shirt and blue sweatpants.
In the second panel, his sister Hina enters the room..png)
.png)
.png)
5. Referrals
Share your referral link from the website (not Google login) to earn an extra 120 credits per signup.
.png)
.png)
6. Chatbot, Templates and Ideas
Use the AI Chatbot to ask questions, upload pictures, or get feedback. Explore script templates and panel format ideas to structure your manga quickly.
.png)
.png)
.png)
.png)
7. Generate and Gallery
When you are ready, hit Generate to create manga panels. Generated panels are saved in the Gallery below the canvas for easy download or sharing.

.png)
8. Upgrading to Premium
Go to Profile > Subscription. Select a plan (Standard or Premium) and complete payment to upgrade.
.png)
9. Text Box
To create or add text boxes, use other apps like Medibang Paint or Clip Studio Paint. To edit generated images, use third-party apps since in-app editing is not available yet.